

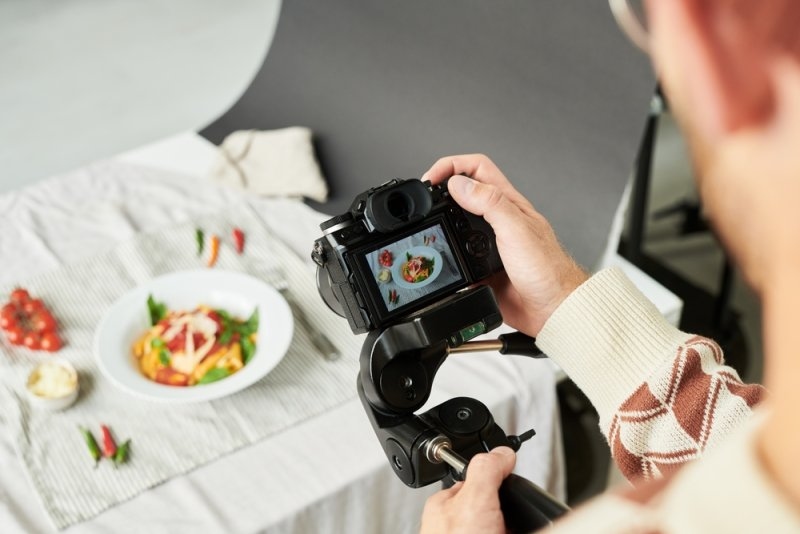
Small tweaks can take a food photo from bland to stunning. If a dish looks boring in a picture, the recipe probably isn’t the real problem. Chances are, the lighting’s too harsh, the plate’s too crowded, or you just shot it from a weird height. The real trick is managing these little things, making sure the meal stays appetizing and real—not stiff or fake.
Honestly, you don’t need much to get started. A phone, some daylight, maybe a napkin, and a fork go a long way. Here, we’re diving into the real stuff: hands-on tips, smart composition ideas, lighting that works, straightforward styling, and easy techniques to make everyday food look amazing.
A strong food photography setup removes distractions before the camera is even opened.
One of the simplest food photography tips is to remove anything that does not help the dish. Check the plate edges, wipe fingerprints, move unnecessary cutlery, and keep the background quiet. A messy table can make even excellent food look careless.
For how to take better food photos, start with three checks:
Good food photography composition makes the viewer notice the main dish first, then supporting details. Try placing the hero ingredient slightly off-center rather than always using the middle. Repeated ingredients, cutlery, or table lines can quietly point toward the food.
For how to compose food photography shots, imagine invisible lines crossing the frame. The food should sit where those lines create interest, not where they simply create symmetry.
Don't Miss: Best Beach Photography Tips for Enhanced Seascape Pictures
Lighting decides whether textures look crisp and appetizing or dull and greasy. The best food photography lighting does not require studio equipment. A large window can provide soft illumination, while a white board or sheet of paper can bounce some light back onto darker areas. Avoid direct overhead room lights because they often create unpleasant color casts.
For how to use natural light for food photography, place the plate beside a window rather than directly in front of it. Turn the dish until highlights appear on sauces, vegetables, or crispy surfaces.
Natural light food photography works particularly well for salads, breakfast plates, drinks, and colorful bowls because it preserves subtle color differences. Watch the time of day, though. Strong midday sunlight can produce hard shadows.
For how to take food photos with natural light, use a thin curtain as a diffuser. It softens the window light without removing the direction that gives the dish dimension.
Food styling photography should improve the dish visually without turning it into something nobody would actually eat.
Effective food styling photography often relies on tiny adjustments. Add a few fresh herbs, rotate a sandwich slightly, expose the filling, or place sauce where its texture catches light. Avoid piling on decorative ingredients just because they are available.
When considering how to style food for photography, ask one question first: would this garnish normally belong with the dish? If not, it probably does not belong in the frame.
Useful food photography techniques focus on what makes the food recognizable. Crispy edges, melted cheese, glossy sauce, flaky pastry, and fresh produce deserve attention. Shoot soon after plating because steam, moisture, and texture can change quickly.
One useful food photography technique is to photograph a spoonful, cut section, or partially opened item. It gives the viewer information that a closed plate cannot.
Suggested Reading: 15 Portrait Photography Types Every Photographer Should Know
The camera angle should match the structure of the food, not simply follow a popular trend.
The best camera angle for food photography depends on height and shape. A 45-degree angle works well for meals with height, while a straight overhead view suits flat arrangements such as grain bowls or pizza. A low angle can make burgers and layered desserts appear substantial.
Try several angles before moving the plate. This is one of the easiest food photography techniques to test.
Food photography composition can become stronger when the frame is cropped tightly. You do not always need the entire plate. A close crop can highlight texture, filling, and color while removing empty table space.
For how to improve food photography, take one wide shot, one medium shot, and one close shot. Compare them afterward. The strongest image is often not the widest one.
A modern phone is enough for useful food photography when the setup is controlled.
Good food photography tips for phones include tapping the main subject to lock focus, lowering exposure slightly when highlights look washed out, and avoiding excessive digital zoom. Clean the lens first. It sounds obvious but makes a real difference.
Food photography does not improve because the camera is expensive. It improves when focus, exposure, and framing are deliberate.
Natural light food photography usually needs less correction because colors are more believable. Keep edits restrained. Adjust exposure, shadows, contrast, and white balance rather than applying heavy filters.
This also supports food styling photography because real textures remain visible. Over-editing can make greens look artificial, sauces look plastic, and skin tones around the plate look strange.
A quick comparison can show what actually changes the image.
| Setup | Visual Result | Best Use |
|---|---|---|
| Overhead | Flat, graphic, organized | Bowls, pizza, spreads |
| 45-degree | Balanced depth | Full meals, desserts |
| Low angle | Tall and dramatic | Burgers, cakes, sandwiches |
| Hard sunlight | Strong shadows | Creative editorial shots |
| Soft window light | Natural texture | Everyday food photography |
The table is useful because food photography techniques are not interchangeable. A dramatic low angle can make a salad look awkward, while overhead framing may flatten a tall burger.
Food styling photography becomes stronger when props support the story. Use a fork, napkin, cutting board, ingredient bowl, or glass when it makes contextual sense. Keep props secondary.
For food photography composition, vary distances. Put some objects close to the lens, some beside the plate, and leave small areas empty. This creates depth without making the frame crowded.
Also Read: Event Photographer: How to Choose the Right Professional
Food photography is all about noticing details. Watch where the light hits, what your camera pulls out, and which parts of the dish jump out. Take tips that make sense for your plate, not just what’s trending on Instagram. Good composition, smart lighting, and down-to-earth styling usually matter far more than buying new lenses.
Try new approaches all the time. Move around. Use the window. Change your angle or where the light hits. Natural light is a simple starting point. Snap a photo, see what worked, switch something, and shoot again. Usually, your second shot beats the first.
Definitely. If your phone or camera’s steady and there’s enough light, you’re set. A tripod helps mostly for overheads, slow exposures, or studio setups—otherwise, you can live without it.
Mostly, yes. Get your shot right after plating while textures still look fresh. Some dishes—like those that steam a lot or sauces that look best after a second—actually look better after cooling off just a tad.
Don’t just repeat the exact same shot over and over. Try a few versions—change your angle, move closer, crop differently, or shift the light. Each shot should show something a little new.
No way. White plates are classic, but they can wash out pale foods. Sometimes a darker, more textured plate helps the food stand out without fighting for attention.
Not always. Simple backgrounds are easy to control, but sometimes a textured tabletop or a bit of context makes everything more inviting. Just make sure your background doesn’t outshine the food. The meal stays in the spotlight.
This content was created by AI