

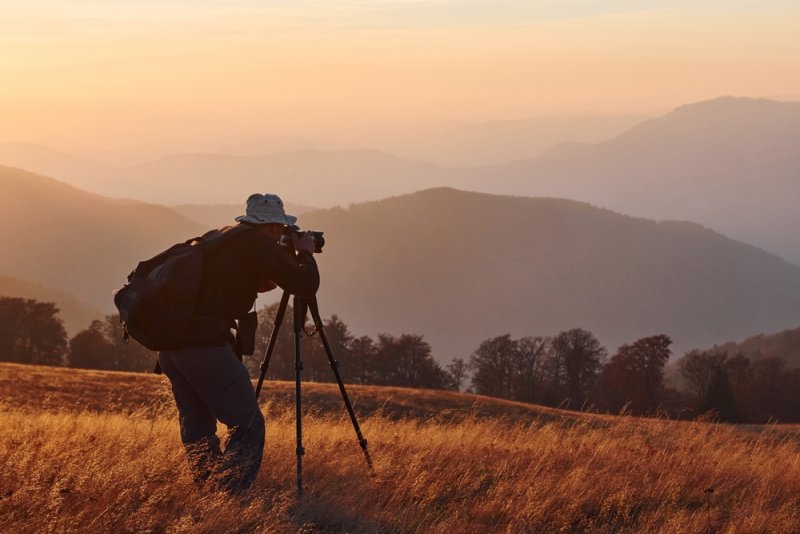
Golden hour photos have a soft, warm hue and can add amazing depth, color, and mood to any shot. Taking photos at sunset and sunrise allows photographers to benefit from lower-angle, softer lighting instead of the strong overhead sun.
This golden hour photography guide helps you learn how to take better golden hour photos for radiant portraits, wonderful silhouettes, and also inventive shadows in a regular scene.
Golden hour usually occurs immediately following sunrise or shortly before sunset. At lower angles of the sun, its brightness has to travel through more atmosphere, which is why, at these times, the light isn't as intense as it is in the middle of the day—it can actually take on a more golden appearance and create long shadows.
The placement of the light is as significant as its warmth. You can position it behind the subject to backlight (rim light), put it off to the side for texture, or face it to capture silhouettes and flare. These features mean golden hour lighting is great for portraits, landscapes, architecture, and all your golden hour pics.
Now, let’s find out how to do golden hour photography and some of the helpful golden hour photography tips that will help you click pics in a unique way:
Arrive early. This is undoubtedly one of the most valuable golden hour photography tips. Look up the time for the sunset or sunrise, go to your location in advance, and make a plan about where your subject should stand. You can even use a sun-position app to get an idea about the light falling there. Planning is everything, as the scene will be a different one just minutes later.
Looking for golden hour photography ideas that go beyond the cliché sunset photo? How about a person walking into the camera through some long grass, sunlight shining through some leaves, reflections on water, a building with side light, or a subject framed by trees? Moving a few feet can give you a different background too.
It's difficult to give a definitive perfect answer as to “what are the best camera settings for golden hour photography?" Use an ISO 100-400 if there's decent light, then add more ISO as the sun falls and it gets dimmer. Use a 1/250 shutter speed to get some decent detail in a portrait, but you can slow down in landscape photography if your camera is steady.
What aperture should I use for golden hour photography?
It depends on the look you want! If you're wondering what aperture you should use for a golden hour shoot, then the f/2.8-f/4 range for golden hour portraits is a good range when you want to get some separation between the subject and the background.
For golden hour landscape shooting, try f/8-f/11 for deep depth of field.
Keep an eye on the histogram and highlights, not just the camera screen.
Golden hour portraits are fantastic if the sun is behind your model or at a slight angle to him or her. Backlighting gives a nice glow to the hair and clothing and can also make the photo very warm, atmospheric, and a bit more hazy. Tell them to slightly turn his or her head away from the sun.
Focus on the face at first and then reposition yourself. If the face is too dark, add a reflector or fill flash or move your position carefully. RAW files also allow for more latitude when editing and recovering shadow details.
When taking a landscape shot during golden hour, composition can be even more crucial as light drops off so quickly. Incorporate foreground objects into your image, such as rocks, trees, a dirt road, or a picket fence, to add depth. Low sun angles create dramatic textures and long shadows; wider lenses can help incorporate foreground, subject, and bright sky.
How to photograph landscapes during golden hour: Learn to photograph landscapes at golden hour. Expose for the highlights unless the sky is significantly lighter than the landscape. Otherwise, take a series of exposures for blending in post-processing, if needed, to hold the highlights and the shadows without forcing a single exposure to cover an extreme dynamic range.
How to use natural light during golden hour: The first step in learning how to use natural light in golden hour is observing the sun and not just pointing your camera at it. Side light can add texture, front light can enhance color, and backlight gives a soft, dramatic look.
Lighting the backlit golden hour shoot: To shoot backlit during golden hour, position the sun just out of the frame or slightly behind your subject. Avoid flaring and keep an eye on your subject turning too dark. Altering your position a little can retain the glow while balancing exposure.
After you learn the core golden hour photography camera settings, I recommend that you experiment rather than capture the same sunset image time and again. Experiment with silhouettes, reflections, sunbursts, close-up objects, moving subjects, and environmental portraits. You can even photograph all the ordinary places that change entirely with warm golden hour light.
Consistently shooting until the sun drops further behind the horizon is another golden hour photography tip. As the sun gets lower, light color, contrast, and direction all evolve, which means you will get several different looks in one shooting session. Adobe also recommends taking multiple shots, as the light can change rather fast.
Golden hour photography is not a matter of expensive equipment but of having the right knowledge about light, time, and exposure. Bring your camera ready for the shoot, try out different shooting directions, select practical golden hour photography camera settings, and keep an eye on your highlights and subject exposure.
Whether you are shooting golden hour portrait photography or golden hour landscape photography, little movement can make a huge difference in the final shot. Follow these golden hour photography tips and tricks to produce warmer, more dimensional, and visually appealing images.
The golden hour happens at dawn and dusk, but it isn't always at the same time on a clock. The amount of time depends on where you are located, what time of day it is, your elevation, and the angle of the sun, so it's best to look up local sunrise and sunset times.
Turn down exposure on your phone so bright skies don't blow out into white. Tap on your subject to focus, reduce exposure to adjust for very bright highlights, and walk around to discover the most pleasing backlight. Lens cleaning will also help make a difference.
You don't need a professional camera. A smartphone camera or basic camera can produce stunning shots if you concentrate on direction, exposure, composition, and timing. Use a clean lens, steady the camera where needed, and shoot a few variations of each composition.
Clouds can diffuse and spread sunshine, resulting in lovely hues and a more even light. Rather than packing it up, look for cloud breaks, reflections, layered backdrops, or spectacular skyscapes. Vary the exposure as the conditions shift, instead of shooting at a fixed setting.
Reduce the dynamic range. Don't forget to take care of the sky highlights; check the histogram. If the shot is very contrasty, use a tripod and take multiple images at various exposure levels and merge the images in post-processing.
This content was created by AI